Photography Techniques for Beginners

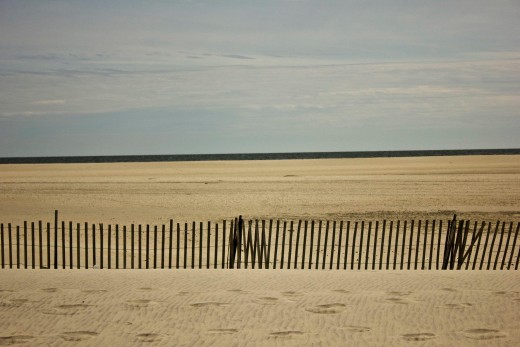
The Rule of Thirds is Known as the Golden Rule of Photographic Composition
If you are a beginner but hoping to improve your camera skills, a kit like this includes everything you need to get started

Getting Off of Automatic - The Many Modes of Photography
Many people think that photography consists of turning on a camera, pointing and shooting, but that is only the beginning. Though the majority of people who take pictures shoot on automatic setting most of, if not all of the time, there is a beautiful world beyond the automatic, pre-set camera setting.
For the purposes of this article, three settings will be covered: manual mode, aperture priority and shutter priority. Manual mode is designated by the (M) setting on your camera. Aperture priority is marked by (A or Av) depending on the camera. Shutter priority is marked by (S or Tv). Each mode produces a different type of final image, except manual, which provides you with complete control over the look of the photograph captured.
- Manual mode: Under this setting, you control the ISO, aperture and shutter speed. This is the mode which gives the photographer the most control over the final image.
- Aperture priority: With the aperture priority setting, the photographer sets the ISO number and the aperture size. Based off of the ISO and aperture, the camera picks the most appropriate shutter speed. This is a good setting for those trying to learn photography, and want to control the depth of field of the shot.
- Shutter priority: Setting your camera to shutter priority mode allows you to set the ISO and the shutter speed. Based on those settings, the camera will select the appropriate aperture. This setting is ideal for beginners who are shooting action scenes or landscapes.
Shooting at Night Works Best When You Use a Tripod

A Shallow Depth of Field is Created When You Shoot at a Low Aperture
Understanding Aperture, or "F-Stops"
The aperture refers to how wide the opening is between the shutters inside the camera. By changing the aperture, you change the amount of light that enters the camera body when you take a photo.
The aperture and the shutter speed are directly related to each other, in that the combination of the two together control the exposure of light absorbed by the cameras light censors.
The aperture is the same as the camera's "f-stop". Common apertures include f/2.8, f/4. f/5.6, f/8, f/16, and f/22. If you are using a more advanced DSLR body, you may notice that you have a wider range of f-stops available to you.
The tricky part about understanding apertures is that the smaller the number, the larger the lens opening. Therefore f/2.8 is a much larger aperture than f/22.
The aperture setting is how you control the depth of field of your image. Depth of field refers to how much of your image is in focus, and how much is out of focus. A photo with a shallow depth of field will have a small amount of the image in focus, with the surrounding parts blurred. The larger the aperture, for example, f/2.8, the shallower the depth of field. A small aperture will create an image that is completely in focus.
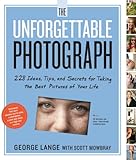
The 15 Things Every DSLR Owner Should Know
Mastering shutter speed takes time and practice. If you are hoping to expand your knowledge of shutter speeds, this book provides extensive insight into various

Shutter Speed in Photography
The shutter speed is the amount of time that the shutter of the camera remains open. The slower the shutter speed, the longer the shutter will stay open, allowing light into the camera. Fast shutter speeds cause the shutter to open and close rapidly, which affects the overall look of the image.
The shutter speed is a measure of seconds, or fractions of seconds. The slower the shutter speed, the longer the camera needs to remain steady in order to obtain a clear photograph. This is why shutter speeds higher than 1/40th of a second are most common when shooting without the aid of a tripod.
Fast shutter speeds result in crisp shots, ideal for shooting action scenes. Slow shutter speeds create a more dramatic look, where time becomes blurred by the long exposure. The shutter speed is directly related to the aperture and the ISO, which all join together to create the perfect image.
Tip: You can increase your ability to shoot in low light without a tripod by raising the ISO, which we already covered.
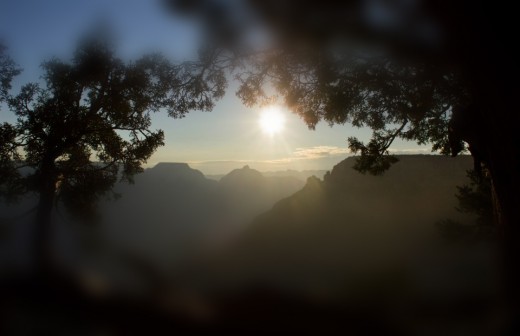
Sunny Days Aren't Actually the Best Day to Shoot- Overcast Days Create the Ideal Lighting for Photographers

Understanding ISO
The ISO setting of a camera is what controls the sensitivity level of the camera's image sensor. The ISO setting controls how grainy the photograph turns out.
The lower the ISO setting, the lower the sensitivity to light is, resulting in finer grain photos. High ISO settings create an extremely sensitive censor, resulting in grainy images.
Higher ISO settings are best in low light situations, such as clubs, concerts and while photographing at night without a tripod. Low ISO settings are great for bright days, when there is an ample amount of light available.
This book provides more tips and tricks to improve your knowledge of photography
List of Tips for Photography Beginners
Tips for photography beginners:
- Practice, and practice often!
- Remember that the best time to shoot outdoors is during the late afternoon, and on days when it is overcast rather than extremely sunny.
- Bring your camera everywhere you can.
- When using the manual setting, jot down what aperture, shutter speed and ISO you use for each shot so you can go back and look at what you like, don't like, and what needs improving.
- When shooting in low light, a tripod is the best way to get stunning photos.
- Shoot in RAW file format instead of JPEG. This gives you more flexibility when it comes to editing your photos.
- UV filters are inexpensive and allow you to protect your lens without wearing a cap all the time.
- Don't go out and spend over a thousand dollars on equipment before you have practiced significantly, developed your craft, and decided for sure that photography is something you really want to pursue. Starter kits, including bodies, lenses and filters can be found for affordable prices and are a great way to get started.
- Share your images with fellow artists to gain constructive feedback.
Mistakes to Avoid as a Beginner Photographer
© 2014 Kathleen Odenthal


